How to felt a shed roof
From time to time, there may be instances where carrying out a DIY roof repair is more economical and easier than calling in a London roofing contractor.
Felt roofing on a shed or an outbuilding is one of these instances. With the relatively low height and small area size, it is quite possible to carry out felt roof repairs or replacements on these yourself. In today’s blog we are going to discuss how you can felt a shed roof. Read on to find out more!
What is roof felt?
Felt is a commonly used roofing material. It is a highly robust material that is lightweight and relatively cheap. In addition, felt has excellent waterproofing properties, making it ideal for flat roofing applications. Felt roofing is traditionally used on sheds due to its lightweight, making it suitable for weaker structures. Felt roofing is commonly available from DIY, or roofing supply stores
What materials and tools will you need?
To felt a shed roof, you will require ladders, a builders knife, rape measure, felt, felt adhesive, brush, 50mm galvanized nails and a nail gun or claw hammer.
An important health and safety tip is to always make sure that your ladders are footed on solid ground and never overreach when carrying out work from ladders. It is always worth having someone to hold the ladders for you. It is also never recommended to walk on a shed roof, as it may not be able to support your weight.
How to felt a shed a roof
The first stage when felting a shed roof is to make sure that the area is prepared. Start by removing any old roofing material, so that you are left with the bare roof structure. If the timber roof decking is rotten, then we suggest that this is replaced as well.
Next, Measure the roof to know how much felt material you require; you will need to measure the area of the roof to be covered. When replacing the felt, remember that you will need to overlap the ends of each sheet by 75mm. We usually find that 5 pieces of felt is sufficient for the coverage of a normal sized shed, although this will depend on the width of the felt roll and dimensions of the shed. Remember to lap joints over and not under, so that water doesn’t run underneath the felt surface.
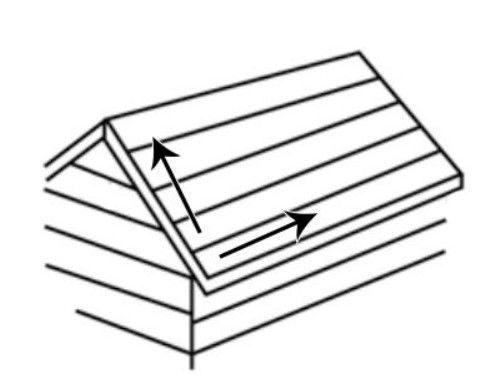
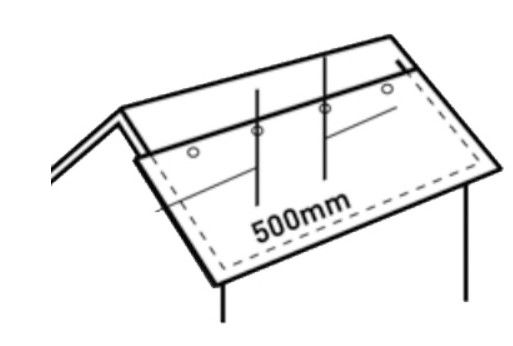
When you lay the first sheet of felt, allow enough coverage at the eaves (50mm overlap) and gable ends (75mm overlap) to sufficiently fold over the edges. The first piece should be nailed with galvanized nails spaced 50mm apart around the overlapped edges and at the top of the sheet at 500mm spacings. Galvanized nails have rust resistant coating, so this is very important.
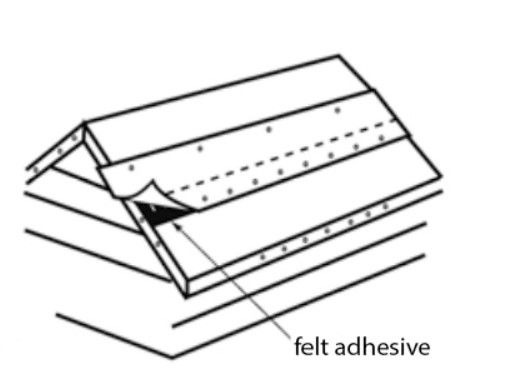
Now lay the second piece of the felt, nailing at the head in the same way as above. Make sure that this piece overlaps the first piece by 75mm and use felt adhesive to stick this on top of the first piece. Apply a generous amount of felt adhesive with a brush and nail in place at 50mm spacings to fully secure.
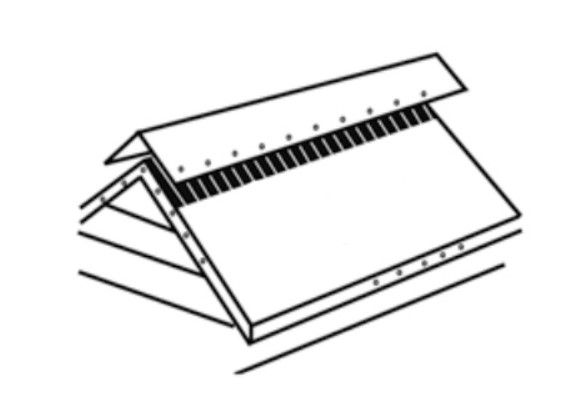
Once each side of the shed has been covered using the above process, apply a cap sheet over the ridge. The cap sheet should cover the ridge and overlap the felt on each side by a minimum of 75mm. Make sure that the cap sheet is firmly pressed down, apply adhesive over the lap joints on either side and nail into place at 50mm spacings.
To neaten up the job, make sure that all overlapped edges at the gable and eaves are cut flush with the edge of the timber. Use your builder’s knife to make a small split in the felt at the overlap at the gable apex, fold over the edge on each side of the roof accordingly and nail in place.
Now you know how to replace a shed roof, you can give it a go on your own. If you require any help with your felt roofing, or if you need any along the way advice, contact Roofers London today!
You might also like